Clay mask: how to make it and what clay is best for you
This post contains affiliate links. If you click and make a purchase, I may receive a commission. Thanks.

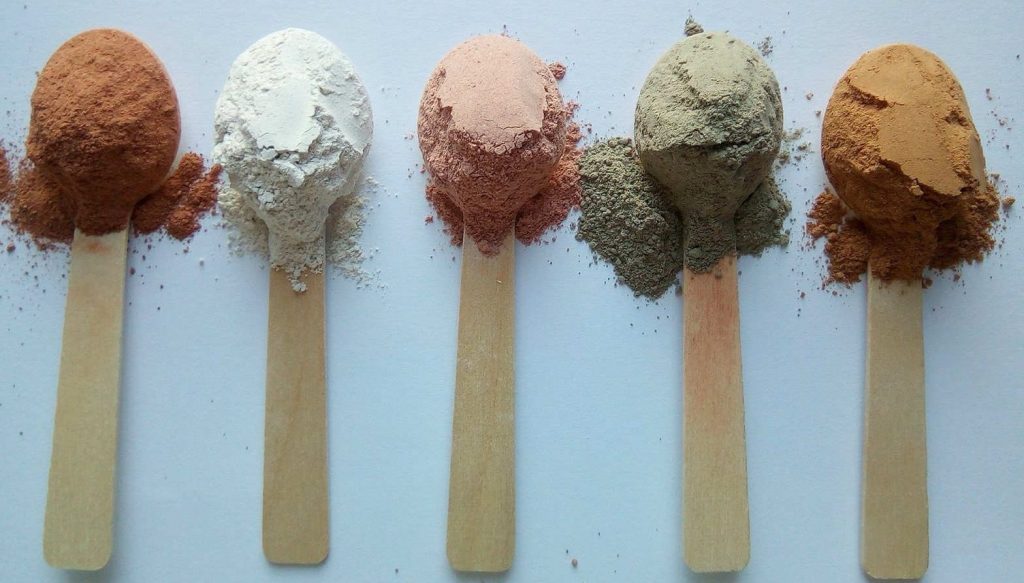
For centuries clay has been known for its amazing skin care properties. It is used to clean, detoxify, tighten and heal the skin. One of Cleopatra’s beauty secrets, in fact, was a facial mask made using white clay, which provided toning and lifting effects. Today we have a varied choice of clays available to us and each of them comes with different properties, textures and colors. Most clay masks tend to draw excess oils from your skin and, therefore, work best for oily or acne-prone skin. But there are clays to choose for those with dry and sensitive skin types as well.
Types of clays
Bentonite clay
You might have heard of a miracle Aztec Healing Clay that all the beauty gurus are raving about. Aztec Healing Clay is just a fancier name for a bentonite clay. In my humble opinion, this is one of the best clays out there. Bentonite clay is known for its powerful detoxifying properties. It can be used both externally (face masks, full body baths) and internally (clay drinks). It is so effective at detoxifying that it is used to clear up cases of heavy metal poisoning and radiation buildup.
The reason for bentonite clays effectiveness lays in its origin. It has formed from volcanic ash deposits that settled on the earth. Over hundreds of thousands of years it absorbed variety of earth’s nutrients and is now in the form as we know it. Once bentonite clay is mixed with water, it’s electrical components change and produce negative electrical charge. This electrical charge comes from the thermodynamic heat and volcanic action that created it. It provides clay with the ability to absorb toxins, heavy metals, impurities, and chemicals. Due to its ability to draw impurities and oil from the pores, bentonite clay masks are often used as an acne treatment.
Kaolin Clay (white clay)
As the name suggests, this clay comes in white color. It is a gentle clay and is suitable for those with sensitive skin. It absorbs toxins but does not draw too much oil, therefore, is a great option for people with dry skin. White clay is used to soften the skin, brighten complexion and reduce redness.

Rhassoul Moroccan Clay
Do not confuse with Moroccan Red clay. These are two different clays. Rhassoul clay has calcium, magnesium, potassium, sodium and silica in it. Therefore, it helps to replenish depleted minerals in your skin. Just like most clays, it absorbs oils well and can be used to clean up pores. But what makes this clay special is that it is suitable for dry skin. In fact, it improves skin tone, elasticity and reduces dryness. When paired with some nourishing oils it can make a great moisturizer.
Moroccan Red Clay
This clay consists of Dolomite, Silica, Ferric Oxide and mineral oxides. Red clay is only mildly absorbent, compared to other clays, so is not the most effective clay to clean up pores. But it is one of the best options for people with very sensitive and dry skin. Red clays main property is to re-balance skins natural barrier. It greatly improves skins texture, tone and elasticity, strengthens it and helps with conditions such as eczema, psoriasis, rosacea and sunburn. Be cautious when using this clay as it could stain your skin or clothing.
French Green Clay (Sea clay)
Green clay is a type of mineral clay valued for its strong absorbent properties. Clay is known for removing impurities, tightening pores, toning the skin and reducing inflammation. These properties make it perfect for people with oily to normal skin or those with acne. What is special about green clay is that it consist of decomposed plant material and minerals such as magnesium, calcium, silica, aluminum phosphorous, copper and zinc. Many alternative medicine practitioners believe that this is what makes green clay especially healing.
Making your own clay mask
So how to make a clay mask? Well, the easiest way is just to mix clay and water. Since clay is the main ingredient in any clay mask, just adding water will create an effective clay mask. The good thing is that you can add additional skin hydrating and purifying ingredients to your mask to make it extra nourishing. So why not?
Additional ingredients
- Replace water with herbal infusions or hydrosols. You can herbal infusions instead of water or together with water. This will provide additional benefits to your mask. Some options:
Rose water - tightens the pores and evens out skin tone.
Chamomile - brightening properties
Rosemary - has antibacterial properties and helps to treat blemishes.
Calendula - helps to heal appearance of scars
Sage - antibacterial and skin balancing properties.
Note: Adding water may seem like the easiest part. However, if you intend to store your handmade mask for a while, you need to only use distilled, purified or deionized water. Water from the tap or bottled water contains chemicals which will make your skin-care products to go bad quicker. Depending on where you live, you may get distilled or purified water in supermarkets, pharmacies or just online.
- Add nourishing oils. Oils can provide many great benefits to your skin. Some of the best oils to add are almond oil, coconut oil, avocado oil, apricot kernel, jojoba and argan oil. However options are limitless. You can read about what properties different oils have Oils work best when mixed with Kaolin, Red Moroccan or Rhassoul clays to make a mask for dry or sensitive skin.
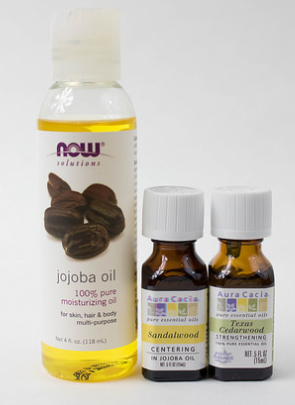
- Add essential oils.Essential oils is another way to add some beneficial and medicinal properties to your clay mask. You only need to add about 1-4 drops per beauty mask. Of course, if you are making a full jar, add more. Good choices for face masks:
- For dry skin: sandalwood, rose, patchouli
- Oily skin: lavender, lemon, basil,
- Acne prone skin: lemon, cypress, lavender, tea tree
- Broken capillaries: rose, chamomile

Photo by Tools of Men via: freeforcommercialuse.org
- Honey is known for its antibacterial and wound healing properties. This has been proven by multiple studies and honey-infused bandages are used all over the world as a natural treatment for infected wounds.
- Vitamin E. Vitamin E is an antioxidant that helps to reduce the oxygen free radical damage from the sun's harmful ultraviolet rays. By reducing this damage it helps to minimize the signs of aging such as fine lines, wrinkles, and brown spots. This is a powerful anti-aging ingredient but it should be used with caution. Only add 1 capsule or less of vitamin E per mask and be aware that vitamin E can cause sensitivity to some people.
- Activated charcoal. Similar to the clays, charcoal pulls unwanted excess oils from the skin, leaving skin smooth and pores minimized. It is a great additive if you want to strengthen clays cleansing properties. Do not use if you have dry skin as it may dry it out even more.
- Aloe vera. Probably one of the more powerful ingredients you can add. No wonder ancient Egyptians called it the “plant of immortality”. Aloe vera moisturizes the skin without leaving a greasy film. Therefore, it is great for both, dry and oily skin owners. Aloe vera gel contains two hormones: Auxin and Gibberellins. These hormones provide healing and anti-inflammatory properties that allow wounds to heal naturally and with minimal scarring. Due to these properties, natural medicine practitioners use aloe vera to treat such chronic skin conditions like eczema and psoriasis. Tip: when adding aloe vera to your clay mask recipe, remove the amount of water. Aloe vera compensate for some water.
- Glycerin is a humectant and its superpower is to attract moisture into your skin. Couple drops of glycerin added to your mask will leave your skin moisturized, soft and with reduced appearance of wrinkles.
Ingredients to add if you want your clay mask to last (important for selling)
Once you have decided on which ingredients to use, just add them all together and mix. Different clays will need a different amount of water, so always start with adding just a little bit. Keep in mind that this way you can make a clay mask for one-time use. If you want to make a bigger batch of the mask and store it in a jar, you will need to add some extra steps. You see, clay masks require water or water-based ingredients, which will mold as time goes. To prevent that you will need to add some preservative. You also may want to add some emulsifiers to your mask. This is only required if any oils are used in the recipe. Emulsifiers help oils and other ingredients not to separate and stay mixed together. Therefore additional ingredients you may need:
- Preservative - helps your skin care products to last longer.
These days there are many preservatives to choose from. Some examples: Germall Plus is quite a popular one, Geogard™ ECT (USA), Preservative Eco (UK), Preservative Eco (Australia). Always use preservatives according to a manufacturer's instructions and adjust the recipe if needed. Different preservatives may need to be added at different phases. Most quality preservatives can be added to the cool-down phase. This eliminates the risk of overheating them.
If you decide to go with Germall Plus - add around 0.1-0.5%. Other preservatives may have different instructions.
Note: vitamin E, rosemary extract and grapefruit seed extract are NOT preservatives.
- Emulsifier – allows water and oil, which would usually naturally separate from each other, to remain mixed. Without it, ingredients in your lotion or cream might separate and you will find oil on top. There are many emulsifiers available to choose from. Some of them: Polawax Emulsifying Wax, Olivem 1000, Natragem EW, Lexemul.
In most cases (unless instructions on the pack state differently), you will need to heat up and mix your oils and emulsifier together. Then heat up water to the same temperature as oils and mix together. This way oil and water based ingredients will mix together well and emulsifier will prevent them from separating. There are emulsifiers on the market that do not require heat, however, if you use solid ingredients such as coconut oil or Emulsifying Wax (emulsifier) then you will need to use heat to melt these ingredients anyway. Adding emulsifier and heating up the ingredients may seem like too much work. But it will make all the difference. Masks that are made without emulsifier will not look good because oil will separate and appear on the top of the jar. It can sometimes look as if the mask has gone bad. It will also be less effective because you will not be able to mix ingredients together well each time you use it. So sometimes your mask will be too oily, sometimes not oily enough.
Add around 25% of total oil-soluble ingredients in your recipe. Oil soluble ingredients are carrier oils, essential oils, fragrance, vitamin E and similar. These ingredients can be found in both, oil and cool down phases (these phases will be explained below later). If you have calculated that all your oil-soluble ingredients add up to 10% of your total mixture, then use 2.5% of emulsifier. Of course, the % might vary depending on an emulsifier used. Always read manufacturer’s instructions.
Equipment
On top of this, you will need some simple equipment. It is the same items that you will need for making most of the skin-care products.
1. Two heatproof containers.
2. Hand/stick blender. Your cream will need to be mixed well. Use white attachment for mixtures less than 300g and the metal attachment for above 300g.
UK: Hand blender
USA: Hand blender
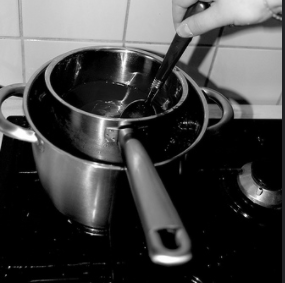
3. A double-boiler (bain-marie) or a saucepan and some metal trivets. The reason you need it is because your beaker with ingredients cannot touch the main saucepan. If it will, your ingredients might heat up too much.
There are many ways to achieve this if you do not own a double-boiler: you can put one saucepan on top of the other (see picture on the right) or just place a metal trivet between the saucepan and your beaker.
By metal trivet I mean something like this:
http://www.brambleberry.com/Double-Boiler-Maker-Double-Boiler-Maker-P3796.aspx

Photo by Worak via:freeforcommercialuse.org
4. Glass lab thermometer (non-mercury) - this is required for measuring the temperature of your mixes in different phases. Getting temperatures right is very important for the final results. These do not cost much and you can get them from here:
You can buy them here:
UK: thermometer and for the US: glass thermometer
Alternatively, you may want to invest in a digital infrared thermometer or an instant digital food thermometer. It provides a quick and clean way to measure temperature and is suitable for measuring everything from meats to baby’s milk.
5. Sanitizer. You need to sanitize all your containers and equipment (anything that could touch your ingredients) before you start making creams. You can get 70% isopropyl alcohol from Walmart or if you live in the UK, you can use Milton sterilizing fluid.
Making professional clay mask
Before we start lets go through 3 phases that are commonly used in skincare making: water phase, oil phase and cool down phase. These phases just explain what type of ingredients need to be added at each phase. So at water phase we add water-soluble ingredients (water, rose water, glycerin, etc.), in oil phase - oil-soluble ingredients (carrier oils, emulsifiers (unless instructed differently), etc.), cool down phase - all other ingredients that are sensitive to heat. It does not matter whether it is oil soluble or water soluble. If it cannot handle 75˚C / 165F temperature, it goes to this phase. This is usually essential oils, fragrance, most preservatives, extracts, most vitamins.
1. Disinfect all your equipment: any jars or container that you will be using, spatulas, spoons and anything else that will come in contact with your ingredients.
2. Place your water phase ingredients in a heat-proof container. Heat up to 75˚C / 165F in a double-boiler. If you do not have a double-boiler just use a standard saucepan and place a trivet or an empty tuna can between your container and a saucepan. You want to avoid direct heat to your container - this might burn ingredients. Once you reach required temperature, hold it for approx. 20min.
3. While your water phase is heating, weight your oil phase ingredients and place them into a second heatproof container. Same as with water phase: use double-boiler or something similar to avoid direct heat. Note: you DO NOT need to hold oil phase heating up for 20 min but you need to make sure both phases are the same temperature when you mix them together.
4. Once water phase (heated for 20min) and oil phase have reached the same temperature - it is time to mix. Slowly pour water phase into oil phase and mix with a blender. Continue to mix at regular intervals for couple minutes. Your mixture will start looking like a white cream.
5. Start adding your clay to the mixture and mix. Keep adding clay in small amounts and mixing until all clay is added.
6. Continue mixing until your mixture cools down to about 45˚C/110F.
7. Add your cooldown ingredients and mix well.
8. Pour your mixture into a ready storage container. Let it cool with a lid open for couple hours to avoid condensation. Do not worry if you think that the mask is too watery. Once it fully cools down it will become thicker. Once cooled down, close the lid and store in a dry area.
Whooila! Your clay mask is ready. Now you have seen the full process of making clay masks and can experiment with ingredients yourself. I have posted some great recipes for clay masks below for you to try.
Nourishing Rose clay mask
30ml Rose water
20ml Distilled water
50g Pink clay
15 ml (approx. 3 teaspoons) Aloe vera concentrate
3ml (approx. half teaspoon) Apricot kernel oil
4 drops Rose essential oil
1 g Emulsifying Wax
1.5 ml (25-30 drops) Preservative
DIY Purifying Mask
1 tablespoon Bentonite Clay
3 teaspoons Rose water
1 drop Frankincense essential oil
1 drop Lavender essential oil
1 drop Tea Tree essential oil
Detoxifying clay mask
2 tbsp. Aztec Healing Clay
2 tbsp. apple cider vinegar or filtered water
2 drops Tea tree essential oil

Hi love
This article is really helpful
I made a ghasoul clay mask with aleo vera and rose water and tea tree oil
I added phenoxyethnol as my perservative however after storing my mask some time later i opened it and the water had seperated from the mask
Do u what the issue is
Thansk
Did you add in an emulsifier? I’m new to making masks but after reading the article, it stated that you have to add an emulsifier and preservative. The emulsifier will keep the oils and water from separating. I hope I’m right and I hope it helps!!!
If i mix bentonite clay with oil, does it then no longer have drawing properties?
If i mix bentonite clay with oil, does it then no longer have drawing properties? Thanks
What’s the percentage for clay masks as in water, oils, Clay, preservative and essential oils ?
Following