Bubble Gum Bath Fizzie recipe [foaming]
This post contains affiliate links. If you click and make a purchase, I may receive a commission. Thanks.

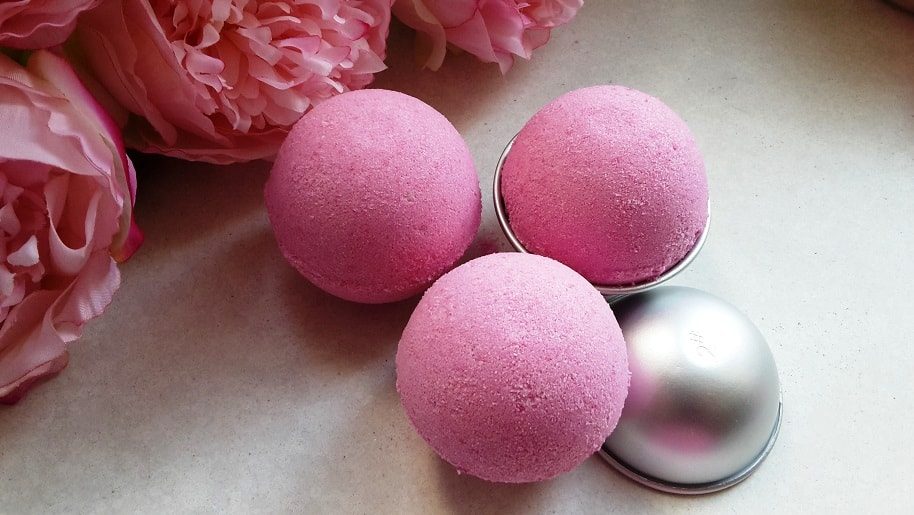
This is one of my favorite bath fizzie recipes. Firstly, because the recipe produces smooth and hard bath fizzies each time. And second, because these Bubble Gum bath fizzies are a real mood booster. I love using them when I am down. The sweet bubble gum scent, vibrant pink water and lots of foam that is oh so so soft... It makes me feel feminine and youthful. I leave bath happy and empowered each time.
Three words to describe this bath bomb recipe? Happy, Feminine & Sweet
So if you need some of that in your life just follow this easy bath fizzie recipe. Oh, and let me know what you think!
Things you will need to make this bath fizzie:
- 1 cup Baking soda
- 1/2 cup Citric acid
- 3 tablespoons of Cornstarch
- 1 tablespoon Sweet Almond oil (or any light oil)
- 1/2 tablespoon Polysorbate 80 - amazing ingredient, read about Polysorbate 80 in bath bombs.
- 1 teaspoon Bubble Gum fragrance oil
- Water soluble dye or food coloring
- Wetting ingredient (alcohol, Witch Hazel or just water)
Equipment:
- Large bowl
- Small bowl
- A whisk (optional as you can mix with hands)
- A sieve (optional)
- Bath bomb mold

Bath fizzie making instructions
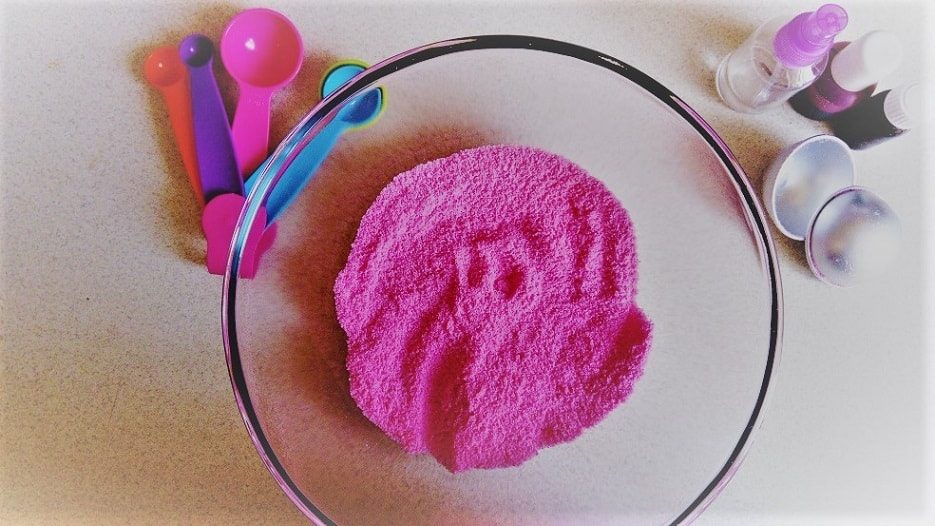
STEP #1 First step to making bath bombs is always to mix your dry ingredients together. You can just go ahead and mix them. BUT if you want your bath bombs to be extra smooth then follow this particular order:
- Sift the baking soda into a large bowl.
- Add cornstarch and mix very well with baking soda.
- Add citric acid and mix very well. The better you mix the smoother your bath bombs will be.
This technique ensures that cornstarch is mixed well. Which results in it filling in any little gaps created by coarser citric acid and, therefore, providing smooth bath fizzies.
STEP #2 Time for your wet ingredients. Add all your wet ingredients (except the wetting agent) to the smaller bowl and mix.
* If you are using coconut oil, melt it before so it could be easily combined with the other ingredients.
STEP #3 It's time to combine your dry and wet mixes. Slowly add wet ingredients to the bowl with dry ingredients and whisk as you go. The finished mixture should barely stick together, like damp sand. If your mixture is too dry, add some more of your wetting agent (water, Witch Hazel or alcohol) and mix again until you get the desired consistency. It is easier to work with the wetting agent if you spray it. I bought a little spray bottle for this.
* if you struggle to mix it well with the whisk try mixing with your hands. Rubbing mixture between your hands works well to incorporate wet ingredients into dry ones. Just don't forget to wear gloves!
STEP #4 Pack your fizzie mixture into the bath bomb molds. Press mixture into the mold with your fingers to pack it tighter. Your bath bomb molds need to be fully packed. This will ensure that they do not break after drying.
* When pressing mixture with your fingers do not press too hard. You want your bath fizzies to be dense but not too much, otherwise, they will sink. They will still work but I, personally, like my bath bombs floating.
STEP #5 Keep bath fizzies in the molds for about 10min. This will give them time to stick together better. Then carefully unmold them.
* If you are using metal bath bomb molds the bath bomb might stick to it and won't want to come out. Do not twist the mold or it might crack in the middle. Instead, gently tap with a spoon all over the mold shell, then turn bath bomb (while still in the mold) upside down and tap on the other half of the mold. Now your bath bombs should slide out of the mold easily.
STEP #6 Let your bath fizzies dry for about 24 hours. Then store them in an airtight container, for example, plastic Tupperware. This will prevent them from activating from moist air in your environment.

And here you have it! A beautiful bath fizzie that does everything a perfect bath bomb should do:
* it fizzes
* colors water in vibrant pink color
* foams
* floats
* moves around
* looks nice
* and smells absolutely amazing
* oh, and this recipe will not stain your bathtub so no cleaning up afterward.
Have you tried this recipe? Let me know what you think about this bath bomb recipe and what other recipes you would like to see.

This would be so awesome to make one. Thanks for sharing. Definitely gonna try this way. Love your bath bomb recipe DIY idea.
Where do u use the polysorbic 80?
Hi Debbie! I’m using Polysorbate 80 in step 2 when I combine the wet ingredients (almond oil, polysorbate and fragrance). Just mix all 3 together in a small bowl and pour into your dry mix.
How many bath bombs does this yield? Using a large metal mold.
Thank you.
Lovely recipe. Wanted to try it before I got my poly 80 in to compare with and without, so far it’s my favorite recipe. I’ve tried a few but this is the one that’s worked best from what I can tell. I’ve also tried the recipe by adding in 1/4 of a cup of epsom salt for added benefits & it has worked well that way too. Thank you for this recipe.
Did you replace any dry ingredient with the epson salt, or just add it as part of the dry mixture? Thank you Mary.
nice article
Nice Article about the Bubble Gum Bath Fizzie. It’s good that you have provided the Proper steps about the Bath Fizzie which Make bath time even more fun.
Visit this site of Bath Fizzie: https://kissnaturals.ca/collections/canada/products/bath-fizzie
IF you were using mica powder for colouring, would you mix it with the wet ingredients so the polysorbate 80 can work its magic? or would you mix it with the dry ingredients?
Hi Becky! I always mix mica with my dry ingredients first. This way I can keep adding mica until I reach the color I want. Then I add my wet ingredients with Polysorbate 80. Everything gets mixed together in the end anyway and its enough for Polysorbate to do its job. I never tried mixing mica and polysorbate first. The idea does make sense but it might be more difficult to get the color distributed evenly.
Doesnt seem to.mattet when I add the polysorbate 80. The color and oil sits at the top and sticks to the sides. I followed recipe exact except I used coconut oil. Is it the oil!?
Where can I find polysorbate 80?
Hi Stephanie, you can get yours on Amazon – https://amzn.to/2Y74nMO. You should also be able to get it in your local soap and handmade supply store. Polysorbate is a popular ingredient, so most stores should have it.
How much water should you add to the mix (when using water and polysorbate 80 and no other oils etc)
Thank you
Have you ever added embeds to this?
How many does this make?
Hi – i was just wondering approximately how many bath bombs this recipe yields? Thanks!
How many bath bombs does it yield and what size molds?
I just made this recipe, and it made two large and one small bath bomb.
Hi there!
So my end result did fizz quite nicely! However the mica and polysorbate 80 are giving me problems 🙁 Wondering what exactly I’m doing wrong? I add my mica to the dry ingredients, however once the bath bomb is nice and dry and put to good use, all of the oil just sits on top of the water and holds the mica in it too. It also tends to just stay at the edges of my tub and float around there. The only thing I did differently was use coconut oil and rose essential oil (since that’s all I have), and used only mica as colorants, no dyes. Hoping for some advice! 🙂
How much water should you add to the mix when using water (water with polysorbate 80 and no other oils etc)
Thanks
Hello! I have obsessively been trying Bath Bomb Recipes for the last 2 weeks. I just got poly 80 this past week, and when adding it to my most successful recipe (which includes epsom) my bombs will not harden. When I use your recipe, but add epsom, it will not harden. There are of course many factors involved in making bath bombs (i’ve experimented with cream of tar tar, humidity levels, beet root powder for color, SLSA, and oil proportions). However, do you think it would make sense that its the combo of Epsom and Poly 80 that might be my problem? Thanks in advance !
THIS IS REAL. I REPEAT, THIS IS REAL. The black mirror is real, the black mirror is really powerful, effective and 100% reliable. My name is Walter Brian, I want to thank Dada Magical for giving his black mirror to me. Since he gave me his black mirror, I became rich, successful, protected, informed and powerful. I was browsing through the internet one day when I saw multiple testimonies on how Dada Magical has helped so many people with his black mirror. I thought it was a joke at first but I gave it a try and contacted him. He sold the black mirror to me and told me how to use it and all that I need to do. I followed the instructions just as he told me and to my greatest surprise, it worked just as he told me. The black mirror is still working for me. The mirror also brings good luck, blessings and information. Contact Dada Magical now on his email; Dadablackmirrors@gmail.com and he will help you also with the black mirror just the same way he helped me. Thank you Great Dada Magical.