How To Make Bath Bombs: The Ultimate Guide + Professional Tips
This post contains affiliate links. If you click and make a purchase, I may receive a commission. Thanks.
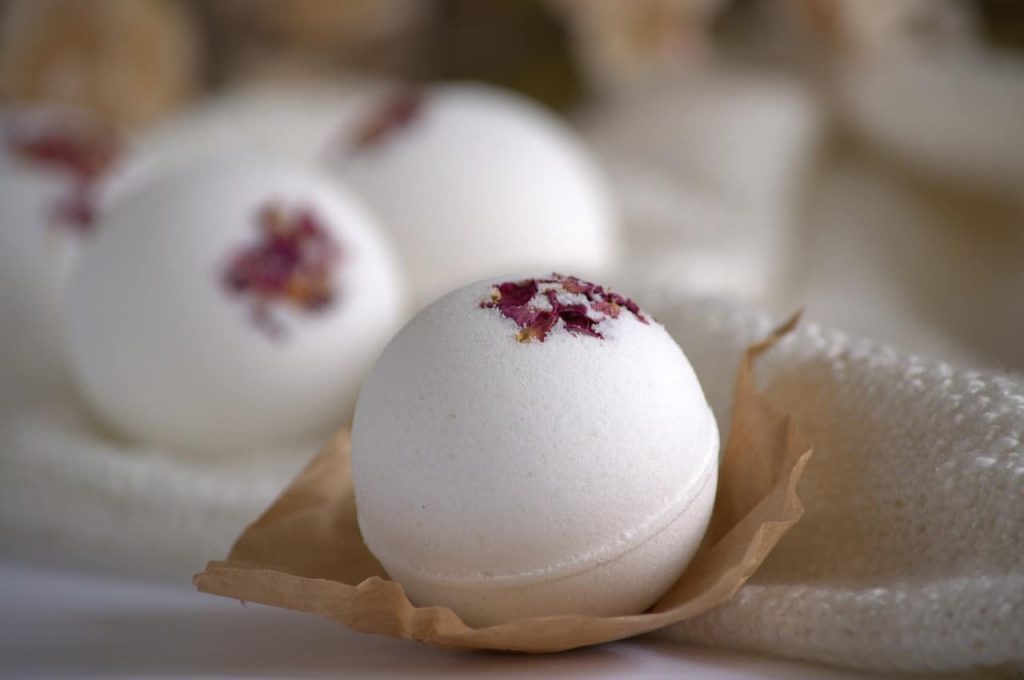
Carrier oils and butter
Oil is what makes bath bombs moisturizing, so make sure you don’t skip them. In general, you can add any oil or melted butter but lighter oils, such as sweet almond oil or grapeseed oil, usually work a little bit better. I usually add 1 tbsp of oil per 1 cup of baking soda.
Polysorbate 80
Polysorbate 80 - it prevents dyes and mica from staining your bathtub. It also helps mix oils with water, so you won’t see any oil blobs floating in the water. The majority of retail bath bomb makers use it in their bath bombs. You can read more about Polysorbate 80 in bath bombs in my post.
Buttermilk powder
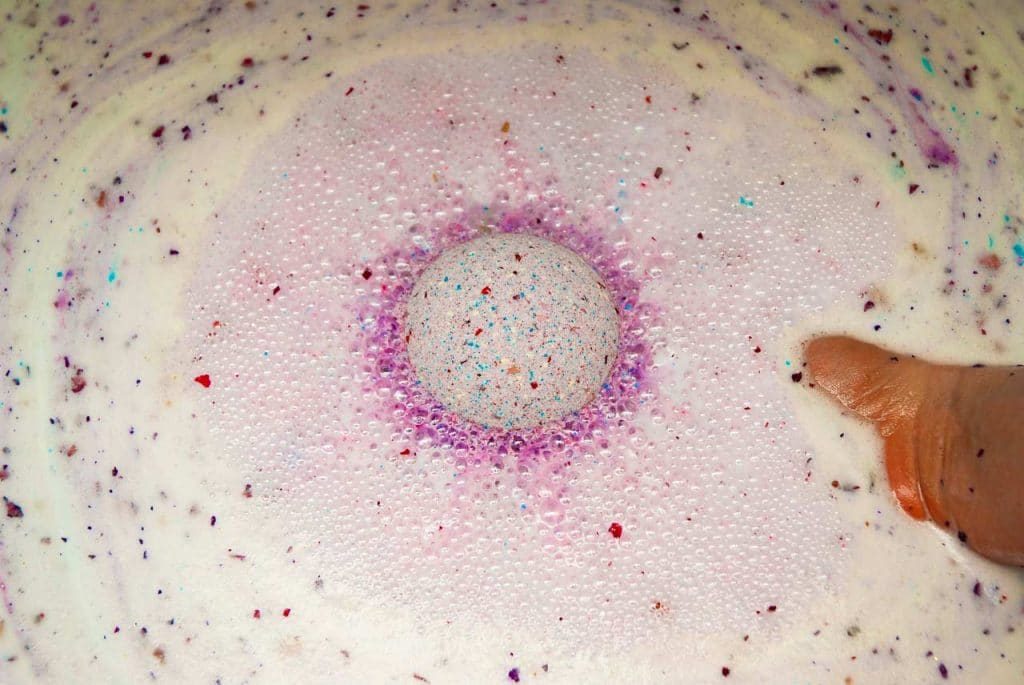
SLSA
SLSA (Sodium lauryl suloacetate) is a very mild foaming agent that is used in a variety of bath products. In bath bombs, it is used to create bubbles. SLSA is sourced from coconut and palm oils. It is much milder than SLS and does not contain any potentially irritating ingredients.
Sea salt / Epsom salt
Sea and Epsom salts are very good for our skin which makes them greats ingredients for bath products. However, I would avoid using salts in bath bombs if you are a beginner. Salts attracts water and can make your bath bombs activate prematurely.
Cornstarch
Cornstarch is a very fine powder that makes bath bombs harder and smoother. It also makes bath water feel very silky.
Bath bomb colorants
Mica powder
Mica powder - a naturally occurring mineral dust that comes in a wide variety of colors. It usually has some shimmer to it. It is often used in mineral makeup, bath bombs, and other beauty products. Mica is easy to use and finished bath bombs with mica look beautiful. However, don’t forget to use Polysorbate 80 to help mica distribute in water better. Also, have in mind that mica won’t create very vibrant colors in the water. For that, you need to use water-soluble dyes.
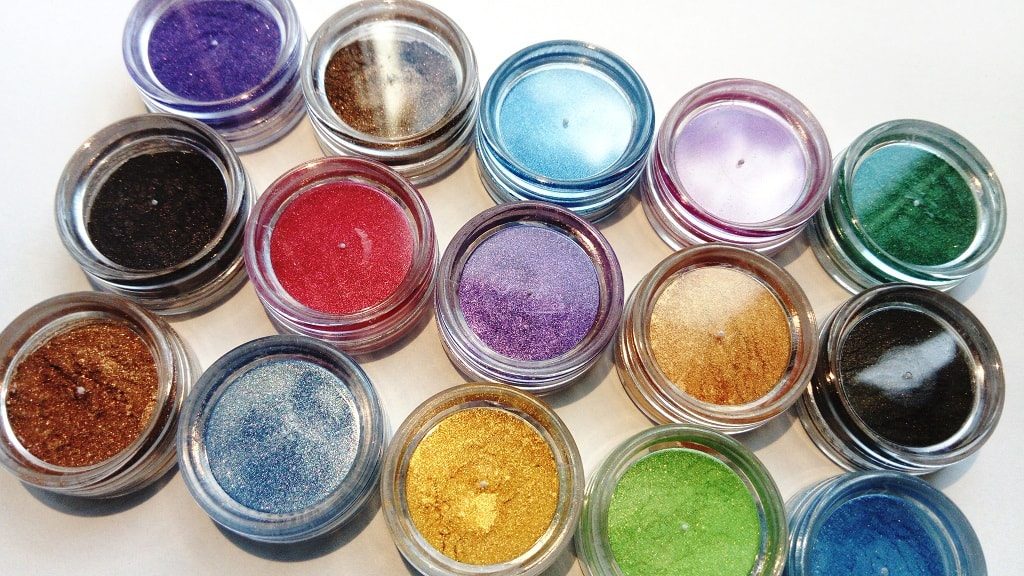
Water-soluble dyes
Water soluble dyes will help you achieve popping colors just like you see in LUSH bath bombs. These dyes can come in a powder form or in a liquid form.
The secret is that water-soluble dyes reveal their true vibrant color only in contact with water. So, people sometimes end up with pale looking bath bombs that create vibrant colors only once in the bathtub. If you want true colors to show up immediately in your mix, you should spray some water and mix. Water will help colors mix better. Since water may activate citric acid, I would advise to dye your baking soda separately first and only then add other ingredients.
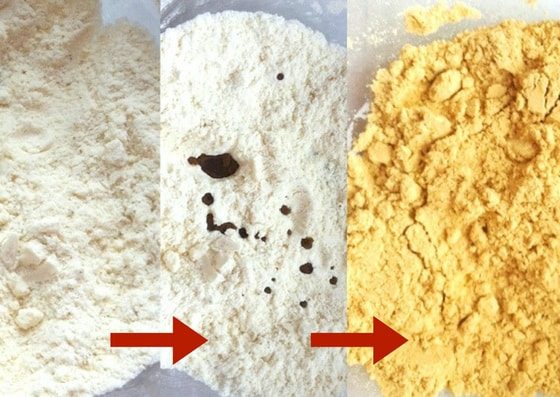
Food coloring
You can also color your bath bombs with food coloring. You may need to add more coloring to get the color you want but the bath bombs should still come out beautiful.
Other coloring options
If you want to make fully natural bath bombs, consider using fruit powders such as strawberry and raspberry powders to color your bath fizzies. Fruit powders give bath fizzies a nice color and smell. For green color, you can use matcha tea powder.
Another great option is to blend flowers and herbs in a coffee blender to get a colorful powder that will color bath bombs. Grind lavender for a purple color, calendula for yellow and so on.
Bath bomb scents
Essential oils
To make your bath bombs smell lovely, add essential oils. Which essential oils to use? It is up to you. Use lavender oil if you want to de-stress and relax before bedtime. Use jasmine oil for stimulating effects or rose oil for a hint of luxury.
Fragrance
If you are not a fan of essential oils or just want your bath bombs to smell more interesting, consider using fragrance oils. There is a wide variety of scents available, ranging from simple strawberry to cotton candy. Fragrance oils are not natural but they are inexpensive and often milder than the essential oils.
Supplies you'll need to make bath bombs
On top of your bath bomb ingredients, you will also need a couple of items:
- a large bowl for mixing
- gloves
- a whisk
- spray bottle
- and of course a bath bomb mold.
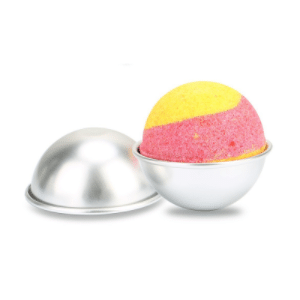
Bath bomb molds
You will need some molds to shape your bath bombs. Traditional bath bomb molds are the sphere ones but you can also choose from a wide variety of differently shaped bath bomb molds. Here are your choices:
Budget metal molds - not bad for a beginner, I started making bath bombs with these. Inexpensive and do the job. Minuses: not very big, metal can bend over time.
Stainless steel molds - good quality, durable molds that are used by professionals.
Plastic molds - easy to use as bath bombs never stick to the mold, however, it creates saturn rings that do not always look good. You can see me using them in this post.
Silicone molds. Silicone molds that are meant for baking or soap making can be used for bath bombs too. They come in a variety of fun shapes, so you can make some really unique looking bath bombs. These are easy to use as long as you choose a simple design as in the link. Avoid molds with small detailing such as flower petals as your bath bombs will most likely crumble at those parts.
Fun and unique molds - if you want to make interestingly shaped bath bombs just like LUSH does have a look at my post about 20 coolest bath bomb molds I found online.
DIY bath bomb recipes
Basic bath bomb recipe
- 1 cup baking soda
- 1/2 cup citric acid
- 3 tbsp of cornstarch
- 1 tbsp of carrier oil (e.g. sweet almond oil)
- 15 drops of essential oil of your choice
- A spray bottle with water
Since no color is used, you can add some dry flowers or orange/lemon peel for the looks
My favorite bath bomb recipe
- 1 cup of baking soda
- 1/2 cup of citric acid
- 3 tbsp of cornstarch
- 1 tbsp of light oil
- 3 tbsp of buttermilk powder
- 1/2 tbsp of Polysorbate 80
- Water-soluble dyes or food dye
- 15 drops of fragrance or your favorite essential oils
- A spray bottle with water
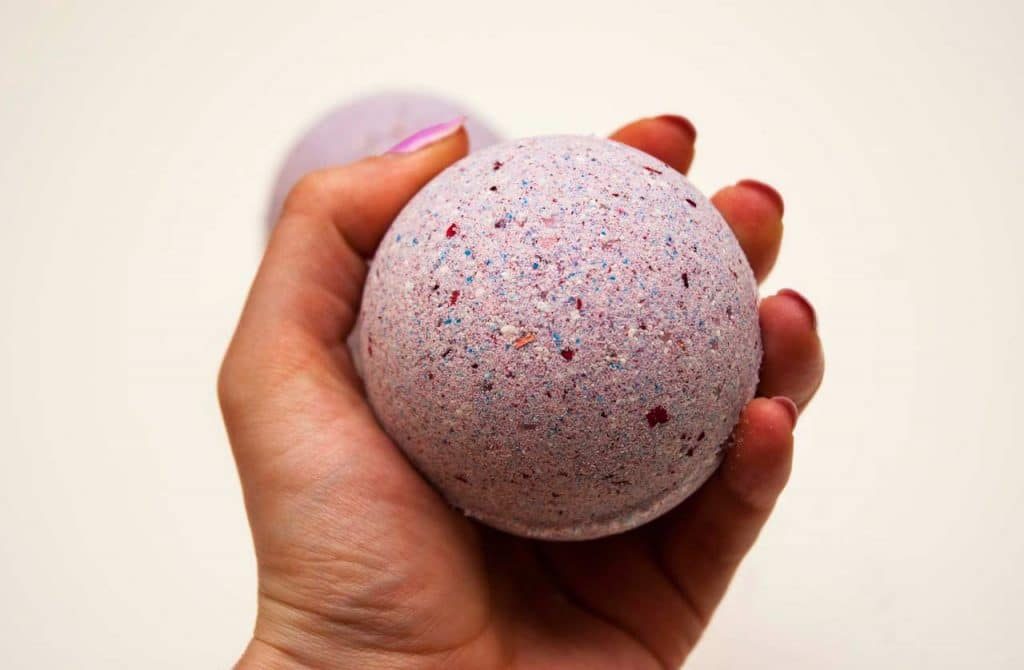
How to make bath bombs - instructions
1. Mix baking soda, cornstarch and buttermilk powder (if using any) in a large bowl.
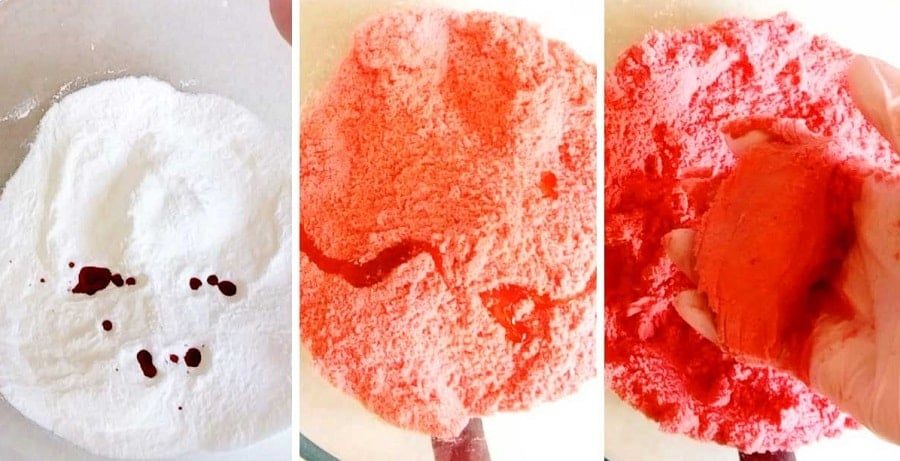
2. Add color. Start by adding a couple of drops and mixing. Add more until you reach the desired shade. You may need to spray a little bit of water to help the color mix better. Couple sprays should do it.
To make sure that the color and other ingredients are evenly distributed you may need to whisk the mixture for full 5 minutes. Your hands may get tired but it's worth it. Wipe off the sweat and carry on!
3. In a separate bowl, combine oil, Polysorbate 80 (if using) and fragrance/essential oils. Once combined, add it to the main bowl and mix.
4. Add citric acid and mix for another two minutes.
IMPORTANT MOMENT:
5. Your finished bath bomb mix should resemble damp sand. To test if your bath bomb mix is ready, squeeze it in your palm. If the mixture stays together – it’s ready. If it crumbles, spray some water (while mixing) and check again.
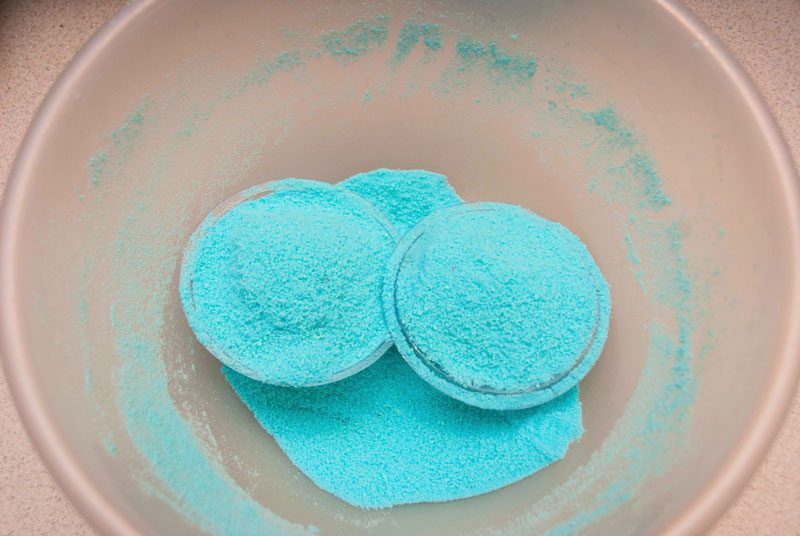
6. Pack your bomb molds. When packing overfill your molds like in the photo below and then press together. Don't twist.
Let the bath bomb sit in the mold for a minute and carefully take it out. Leave to dry overnight.
Tip: If you live in a very humid environment, place some dry rice around your bath bombs. Rice will absorb the moisture helping the bath bombs dry faster.
Ta-dam! Your bath bombs are ready. Beautiful aren’t they? What makes it exciting about making these at home is that you can customize the oils and colors to create the best experience for you. Whether you want something relaxing, luxurious or fun and glittery, you can achieve that just by tweaking the recipe.
Bath bomb making tips
• How to make bath bombs smoother?
I think that most of you will agree with me when I say that smooth bath bombs look prettier and more professional. There are a few simple things that you can do that will help you make smoother looking bath bombs:
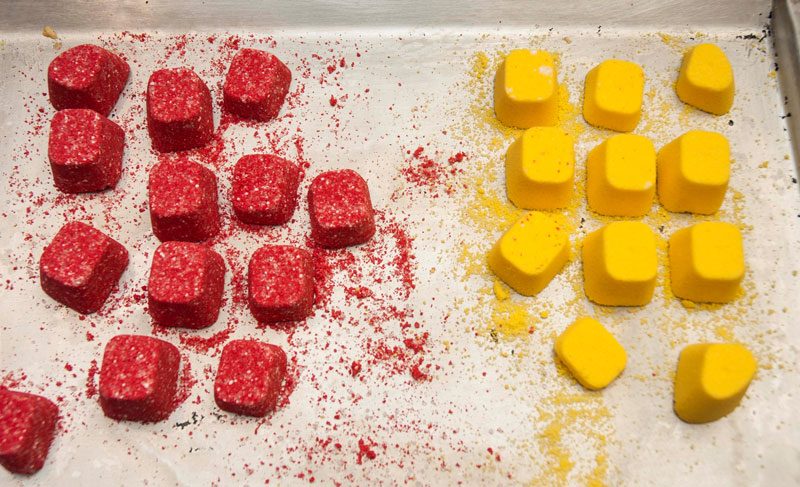
1. Choose finer citric acid. The finer powders you use the smoother your bath bombs will be. This is extremely important when choosing citric acid. Coarse citric acid won’t mix with the rest of the ingredients as well and will be visible in a finished bath bomb. On the other hand, fine citric acid will blend in well and produce smoother looking bath bombs.
Just look at the picture below. I used the same recipe to make bath bomb embeds but chose coarse citric acid to make the red ones and finer version for the yellow ones. The picture speaks for itself. If you bought coarse citric acid, you can grind it in a coffee grinder to get finer powder.
2. Consider adding some cornstarch to your recipe. Cornstarch is a very fine, smooth powder, so it helps smooth out bath bombs.
3. Use a sieve when you add baking soda. Sometimes baking soda comes with little lumps that could ruin the look of your bath fizzies. It also helps distribute ingredients more evenly in a bowl before mixing.
4. Mix your bath bomb mixture very well. I cannot stress this enough. Professional bath bomb makers use kitchen aid type of mixer for mixing. If you think you’ve mixed long enough then mix for another 2 minutes. This will help with smoothness, hardness and even color.
• How to make bath bombs harder?
1. To make bath bombs harder, try adding additional ingredients such as cornstarch, cream of tartar or white kaolin clay. If you read my bath bombs recipes, you know that I use cornstarch for this task. It is inexpensive, and it makes bath bombs harder and smoother. 2-3 tbsp of one of these ingredients per 1 cup of baking soda should do the trick.
2. Try mixing your ingredients longer. The powders will stick together better when mixed properly.
3. Try using water as a binder. I know this is counter-intuitive advice as you probably heard that you should avoid using water when making bath bombs due to the risk of premature activation. I use water and I find that it helps my bath bomb mix stick together better and makes my bath bombs hard.
Like most, I started making bath bombs using alcohol as a binder. Later, I started experimenting with a 50:50 water-alcohol mix and now I use only water. To avoid premature activation, I spray water to my mix while mixing with a whisker at the same time. I use a small 100 ml spray bottle to make sure I don’t spray too much water.
• To help bath bombs dry better, place some rice around them. Rice will absorb the moisture from the air, so your bath bombs won’t.
• If you’re planning on making many bath bombs, for example for sale, consider investing in a dedicated kitchen aid type mixer. That is what professional bath bomb makers use. It mixes ingredients a lot better than you could ever do manually and with minimal effort. As I already mentioned previously, good mixing is key as it will help you make bath bombs that are smoother, harder and have even color.
• Some essential oils and fragrances can be problematic when used in bath bombs. Fragrances that contain vanilla can turn light-colored bath bombs brown and citrus essential oils can prevent bath bombs from hardening.
• If you struggle to remove bath bombs from the metal molds because they stick too much, try this trick: take a spoon and tap all over the closed bath bomb mold. This will help separate the bath bomb from the mold and removing it should become easier.
Safe for later:

I keep coming back to your favourite bath bomb recipe – it works every time and feels great on the skin in the tub! I have had some disasters with other recipes and issues getting the bombs out the moulds, but not with this trusty recipe – thank you!!
Thank you so much for your amazing recipes… I tried bath bombs and it’s fantastic! Good luck 💙
When you use a kitchen aid mixer, what tool do you use? i.e., paddle, wisk, hook…
Thanks!
I use the whisk which works a treat 🙂
How many bath bombs does this recipe make? I need to make 80 for a friend and was not sure how much supplies to buy
Could you recommend a good quality essential oil please.
how many does this make?
Any tips to make the bathbombs fizz for longer and not last a few seconds only???
What is this recipe in grams please? I’m in UK and our cup measurements are different than the US
Thank you
You can easily convert this yourself using Google.
I guess it depends on size and mold
Thank you for all this awesome information. This is the most informative bath bomb instructions I have read. Thank you so much !
How to remove bath bombs from silicon moulds
6
Thank you for all the insightful information. I’m so excited to try all these new ideas.
Your article looks very helpful but would you mind giving the formula in percentage? If that’s ok. Thank you.
Im ready to make these for my bathrooms, only question where do you get your products from?
I am curious what Mica you use, when I click the link in the article it routes to the Buttermilk Powder rather than the Mica.
Also for your favorite recipe, if we don’t have Buttermilk Powder, should we just skip it or do we need to alter the other dry ingredients for make up for it?
if you are making the favourite bath bomb recipe, how much SLSA do I need xxx Love this recipe
I’m curious about this too. We don’t have buttermilk where we live, do I just swap out that for the SLSA? Or add another type of powdered milk and some SLSA as well?. A very novice bath bomb maker, any tips are greatly appreciated as I find my feet thanks!
From this article you will get to know about how to make bath bombs.This article gives suggestions on limitations and delimitation of such selection. I enjoyed reading while going through this article and this is the best link for gaining all the information about it.
https://heartandsoap.com/
Hey thanks for posting this useful information about how to make bath bombs here, I really hope it will be helpful to many. It will help a lot; these types of content should get appreciated. I will bookmark your site; I hope to read more such informative contents in future. Appreciative content.For more info:-http://heartandsoap.com/
Great tutorial! Out of curiosity, where are you located as far as the humidity factor for the success of your recipe? Do your bombs float and spin? I haven’t been successful as well as having major cracking with various recipes. (I’m in the PNW.) Thanks!
My bath bombs have swelled outside of the mold overnight twice, and look like something out of ghostbusters afterward. I follow the recipe each time and out of 6, this has happened twice-any idea?
Don’t leave them in the mold overnight. Take them out after a minute or two.
So i made the recipe that has the buttermilk and polysorbate 80. Followed it to a T. I packed my molds very tightly the first time and they began expanding out of the mold with flaky biscuit-like separation. So i unpacked them and re-did the process without packing, just overfilled loosly and put them together. They came out of the mold really well but now as they sit in the rice bed, gravity is taking over and the bottoms are smooshing down. Has anyone experienced this? And if so whats the sweet spot to get them to maintain shape without expanding or deflating?
I have tried this recipe today using liquid food colouring. I ended up with a grey concoction in my bowl! Eventually, after more colouring than I imagined I would need, and over 40 minutes of mixing, it did not make a difference. So my bath bombs are grey with tiny flecks of the colour they are supposed to be. Where did I go wrong?
Hello! Can I replace the butter milk powder with milk powder? Thanks and happy new year!
Yes!
Roughly how many bath bombs does this make?