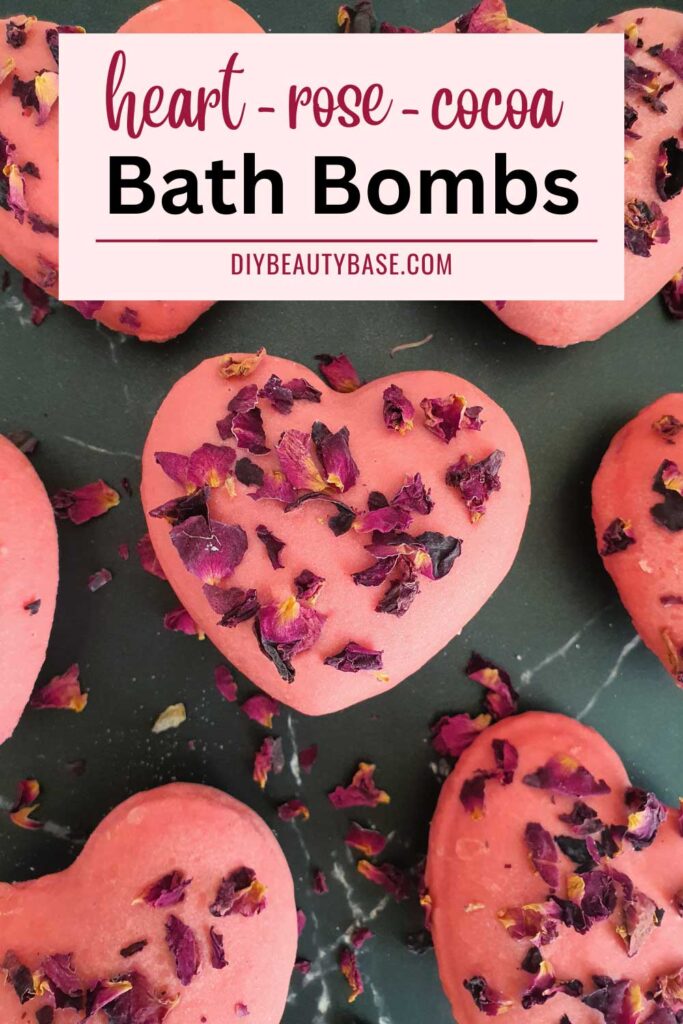
💝 DIY Heart Bath Bombs With Cocoa Butter Glazing And Rose Petals
This post contains affiliate links. If you click and make a purchase, I may receive a commission. Thanks.
Hi there! Thank you for stopping by. Today, I’ll be showing you how to make the perfect pink heart bath bomb, dipped in a creamy cocoa butter glaze and decorated with rose petals.
These beautiful and luxurious DIY bath bombs not only look amazing but are also incredibly moisturizing thanks to the cocoa butter glaze. Whether you’re looking for a thoughtful DIY gift for Valentine’s Day or just want to pamper yourself, these indulgent bath bombs are the perfect self care treat.
In this post, I’ll provide you with a recipe for both bath bomb and bath bomb glaze and step-by-step instructions to ensure your homemade bath bomb turns out perfectly every time.
So, let’s get started!
HEART BATH BOMB RECIPE
Ready to make some lovely heart shaped bath bombs?
Here’s what you’ll need for the bath bomb recipe:
Baking soda (sodium bicarbonate) and citric acid are the main ingredients of a bath bomb recipe. The two combined create a stunning fizzing effect when they come in contact with water.
Cornstarch hardens the bath bombs and makes bath water silky soft.
Buttermilk powder adds foam and moisturizes. Can be substituted with another milk powder such as coconut milk powder or goat’s milk powder.
Liquid oil such as sweet almond oil or melted cocoa butter, to help hold dry bath bomb ingredients together and moisturize the skin.
Polysorbate 80 is an emulsifier (solubilizer). It prevents dyes and mica from staining your bathtub and mixes oils with water. It is food grade and can be found in many processed foods we eat. You can find out more about Polysorbate and how it works in bath bombs in this post. If you are interested in a fully natural option, I recommend – Sorbitan Oleate.
Pink (Rosy) mica powder to color bath bombs. You can also use a soap colorant or food coloring to add a pop of color to your foam. I used mica powder to minimize the ingredient list for this recipe, as it serves dual purpose as both a colorant for the bath bomb itself and for the cocoa butter glaze.
Essential oils lend the bath bombs a natural scent. Later in the post I’ll share with you some amazing romantic essential oil blend ideas.
Water and high-proof alcohol solution in a spray bottle to moisten the mixture.
Here’s what you’ll need for the cocoa butter bath bomb glaze recipe:
Cocoa butter is the best butter for the bath bomb icing / glazing as it is one of the hardest butters and solidifies after dipping.
Baking soda thickens the cocoa butter glaze, making it more opaque and cost-effective by allowing you to create more bath bomb icing using less cocoa butter
Polysorbate 80 is needed to make sure that cocoa butter and mica powder fully emulsify with bath water.
Pink/red mica powder to color bath bomb glazing. I used rosy mica powder to color the bath bomb and a mix of rosy and red mica to color the the glazing. Both colors are from this mica powder set.
Other supplies:
– Heart shaped bath bomb mold (I used a 3D printed bath bomb mold like this heart bath bomb mold press, but you can achieve same results with these heart-shaped molds (these are actually not bath bomb molds but fillable ornaments. But I have these in a round shape and they work fantastic for bath bombs!).
– A large bowl for mixing ingredients;
– Gloves;
– Heat resistant bowl or stainless steel double boiler pot for melting chocolate.
ROMANTIC ESSENTIAL OIL BLENDS FOR HEART BATH BOMBS
Enhance the experience of using these beautiful heart bath bombs with the addition of these romantic essential oil blends:
♥ I love myself unconditionally: 3 drops of Lavender + 3 drops of Sweet Orange + 2 drops of Geranium + 2 drops of Clary Sage
♥ Be Mine: 3 drops Sandalwood + 3 drops Sweet Orange + 3 drops Pink Grapefruit
♥ Still The One: 6 drops Sweet Orange + 2 drops Lavender + 2 drops Ylang Ylang
♥ Ohh La La: 3 drops Sandalwood + 2 drops Sweet Orange + 2 drops Jasmine
HOW TO MAKE HEART BATH BOMBS
Step 1: Combine dry ingredients
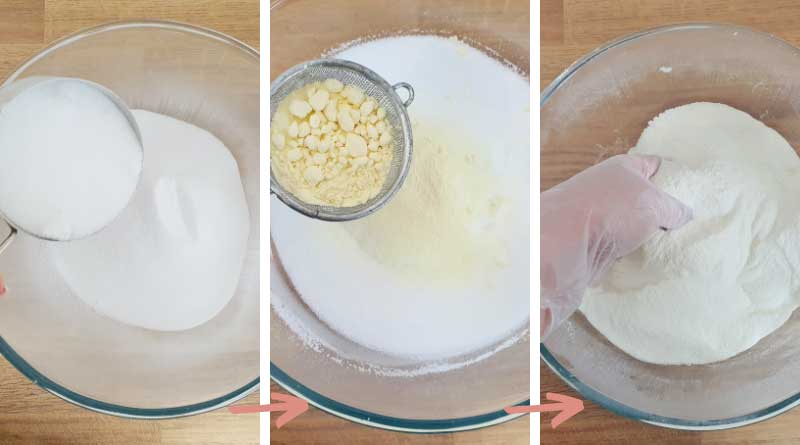
– In a large mixing bowl, combine the baking soda and citric acid.
– Sieve in the cornstarch and buttermilk powder to make sure that they are evenly distributed throughout the mixture.
– Both the cornstarch and buttermilk powder are fine powders that have a tendency to clump, so sieving is important to guarantee uniformity in the bath bomb mix.
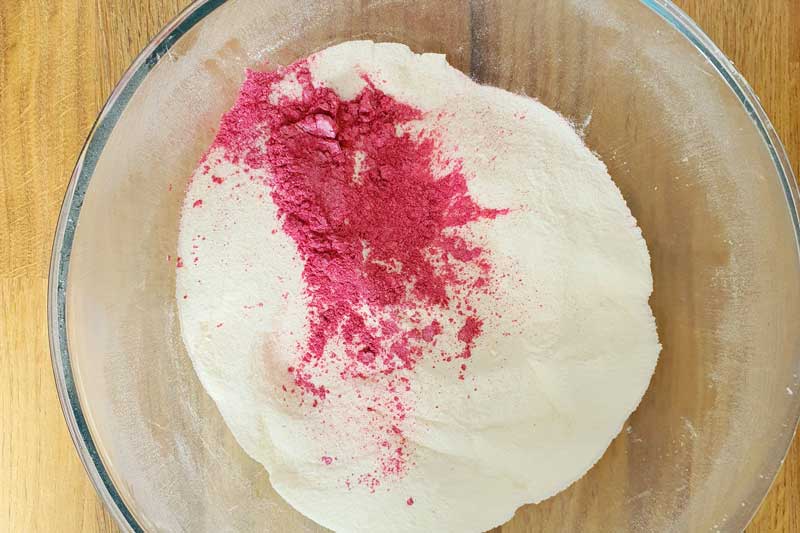
Step 2: Add color
– Add the pink mica powder and mix thoroughly. As a guide, I used about 3 dashes, but you can adjust the amount to achieve your desired shade.
– You can also opt for liquid soap color or food coloring to achieve a more vibrant hue. Liquid soap colorant or food coloring will tint the bath bomb foam in addition to the bath bomb itself. Using mica powder will result in a white foam.
– Please keep in mind that it can be challenging to achieve a dark and intense color with mica powder. For my recipe, I aimed for a light hue, but if you prefer a darker shade, consider using liquid colorant.
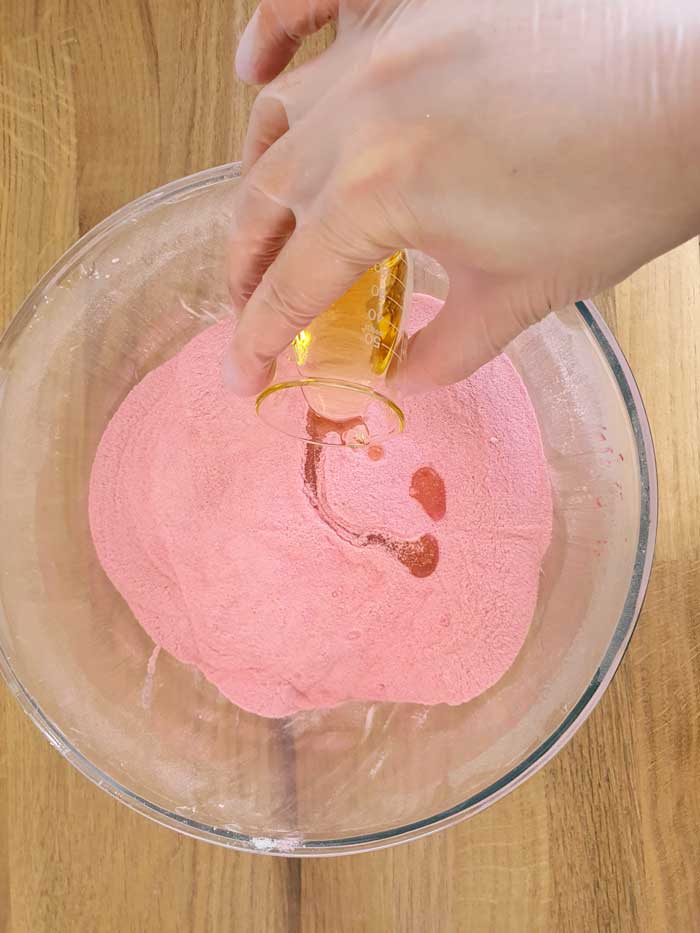
Step 3: Mix in liquid ingredients
– In another mixing bowl, combine the oil (or melted cocoa butter), Polysorbate 80, and essential oils. Mix these ingredients thoroughly and then add to the main bowl.
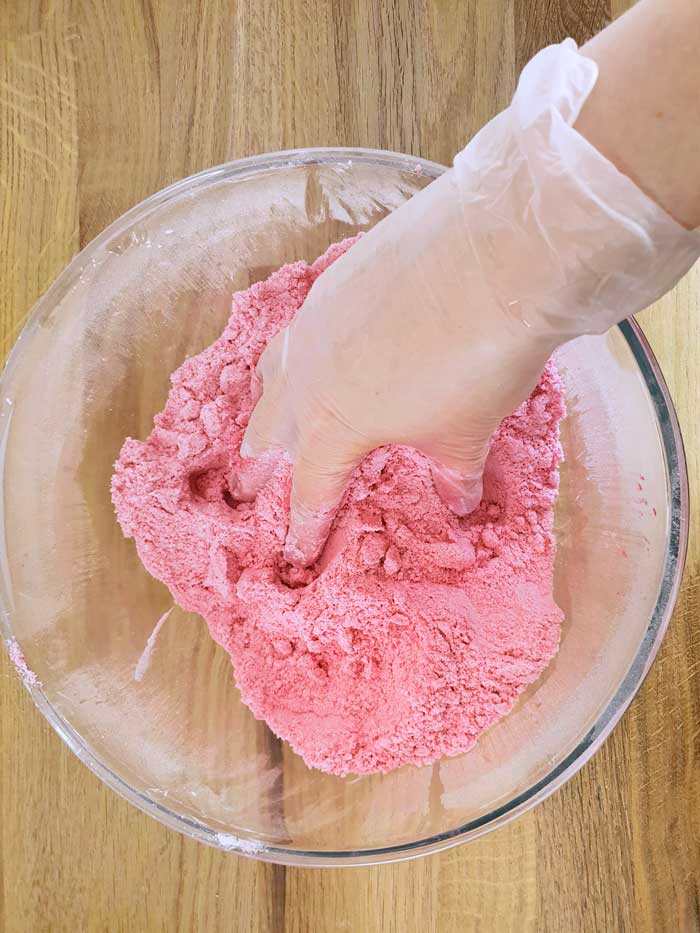
Step 4: Mix the bath bomb mixture
– Keep mixing the bath bomb mixture for at least 5 minutes to make sure that the liquid components are well incorporated.
– I prefer using my hands for mixing (don’t forget to wear gloves).
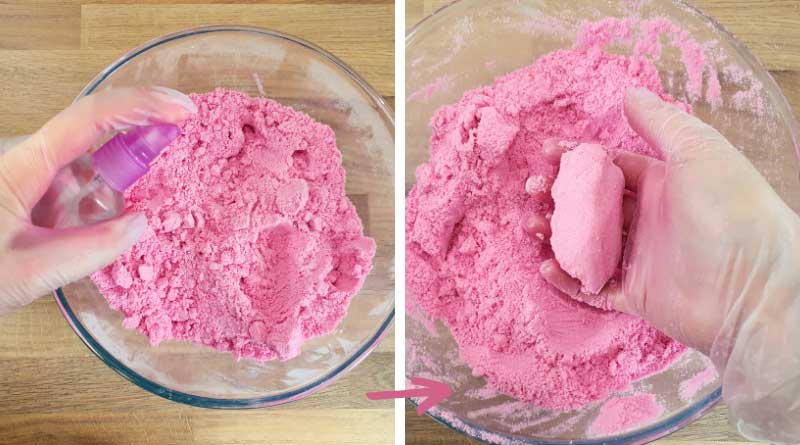
Step 6: Test consistency
– The final mixture should have a texture similar to slightly moist sand. To test its consistency, try squeezing it in your palm. If it holds its shape, then it’s ready to be molded. If it crumbles, add moisture by spraying a mixture of half rubbing alcohol and half water from a spray bottle. Mix immediately after spraying.
– Instead of the water and alcohol mix, you may also use witch hazel or plain water. If you use plain water make sure you only spray a small amount at the time and mix immediately to avoid prematurely activating the citric acid.
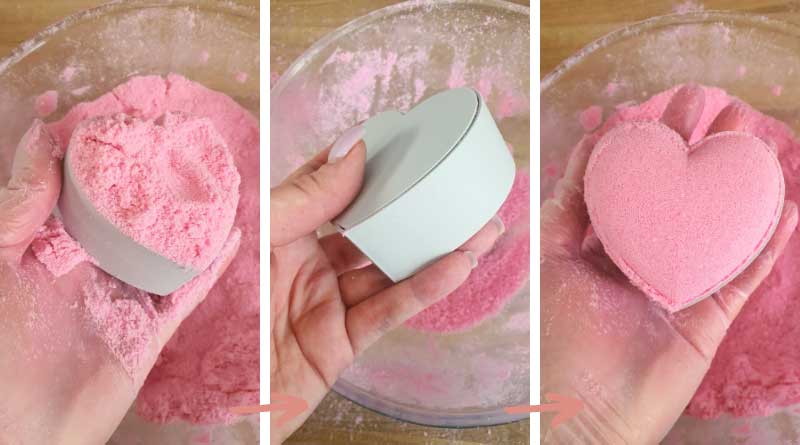
Step 7: Packing the heart-shaped molds
– Scoop a small amount of the mixture into the mold and press it down firmly with your fingers to make sure the edges are filled.
– Add more of the mixture, making sure each mold half is slightly overfilled. Repeat for both halves.
– Carefully bring the two halves together and firmly press them together.
– Hold the mold in place for 15 seconds, then remove the bath bomb from the mold.
Step 8: Dry the bath bombs
– Let the bath bombs dry for overnight in a dry cool place.
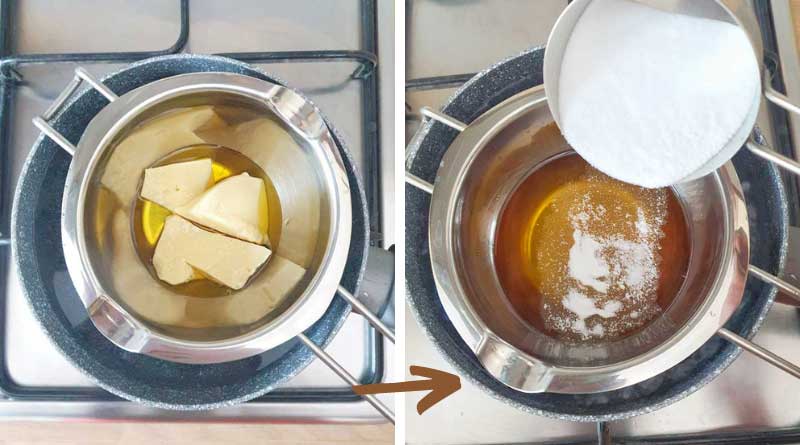
Step 9: Make cocoa butter glaze
– Slowly melt the cocoa butter in a double boiler over low heat.
– Once fully melted, incorporate the baking soda and stir until fully combined.
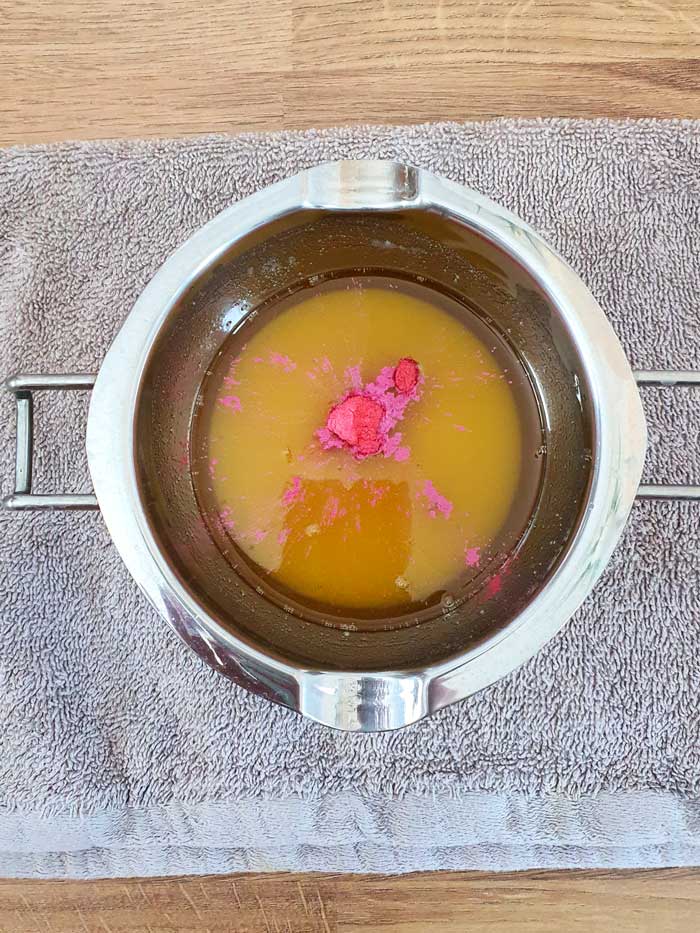
Step 10: Color cocoa butter glaze
– Remove from heat and stir in the mica powder to desired intensity. I added approx. 4 dashes of mica powder, but you can adjust it according to personal preference.
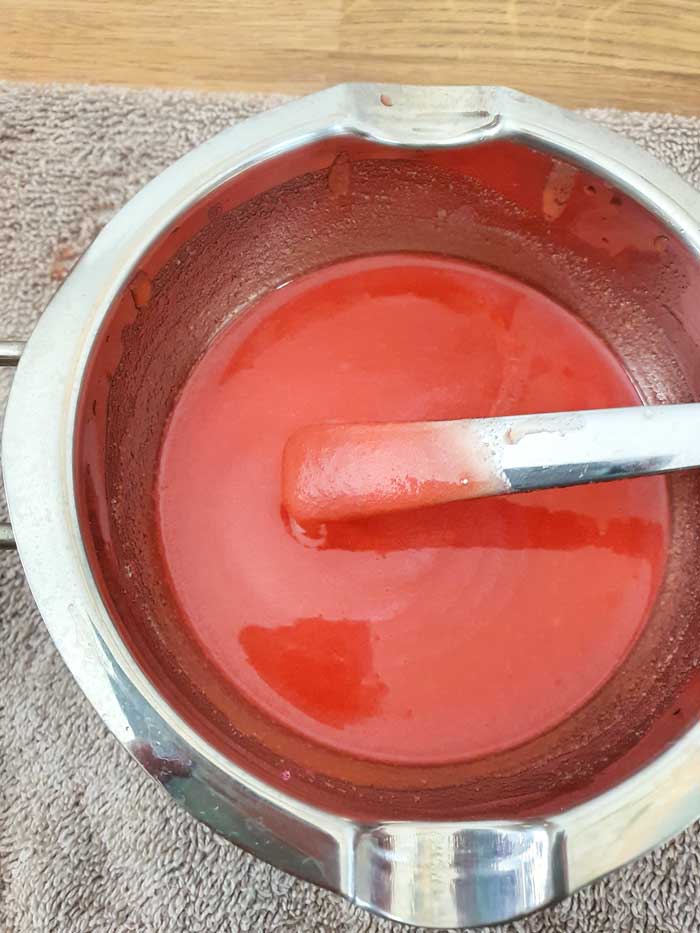
Step 11: Let cocoa butter thicken
– While cocoa butter is hot, you will notice that even though you mixed it with baking soda, the soda sinks to the bottom. This will change once the cocoa butter starts cooling down. Let it cool down for a couple of minutes and continue to mix it. You will notice the mixture thickening slightly like in the photo below. At this point, you can start dipping your bath bombs.
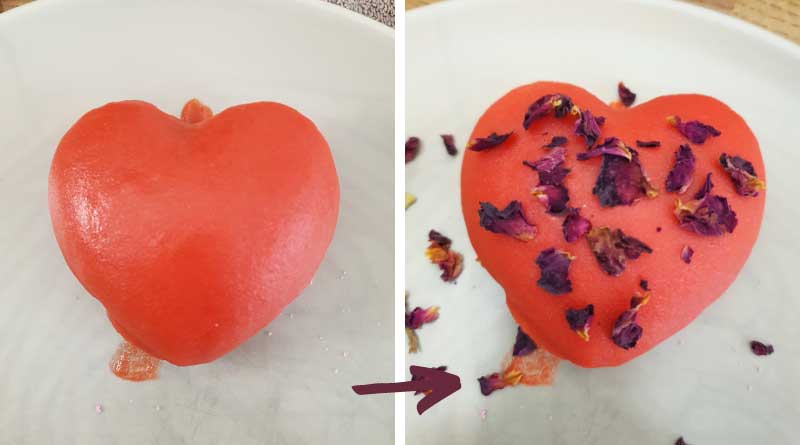
Step 12: Dip heart bath bombs in cocoa butter glaze
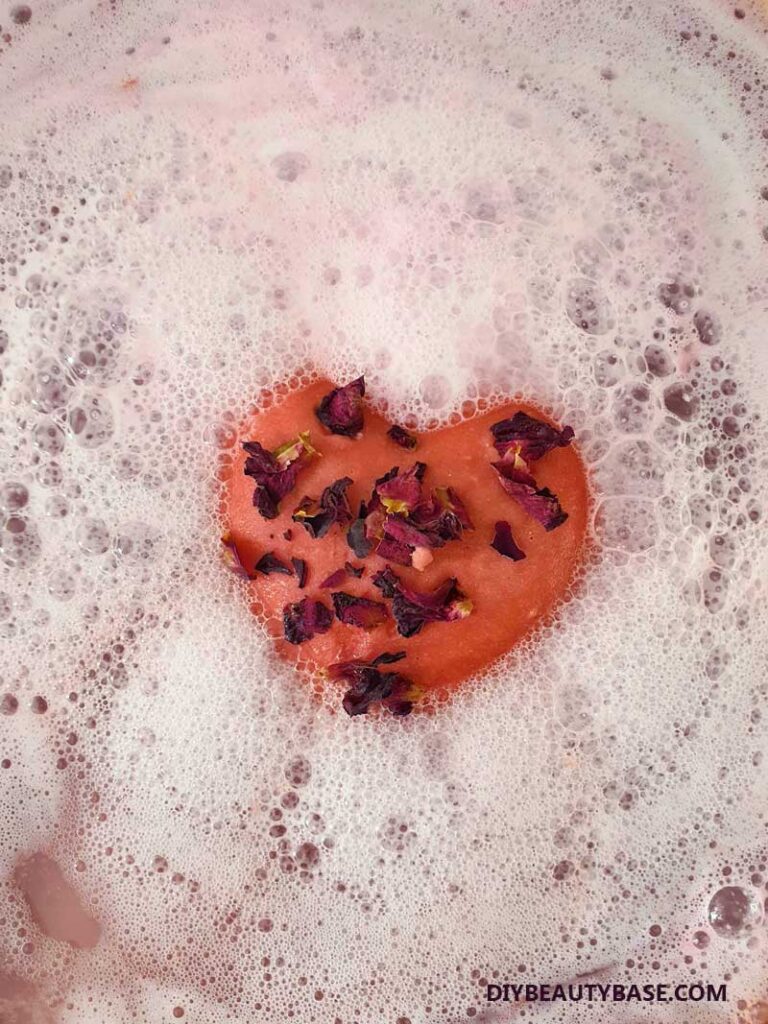
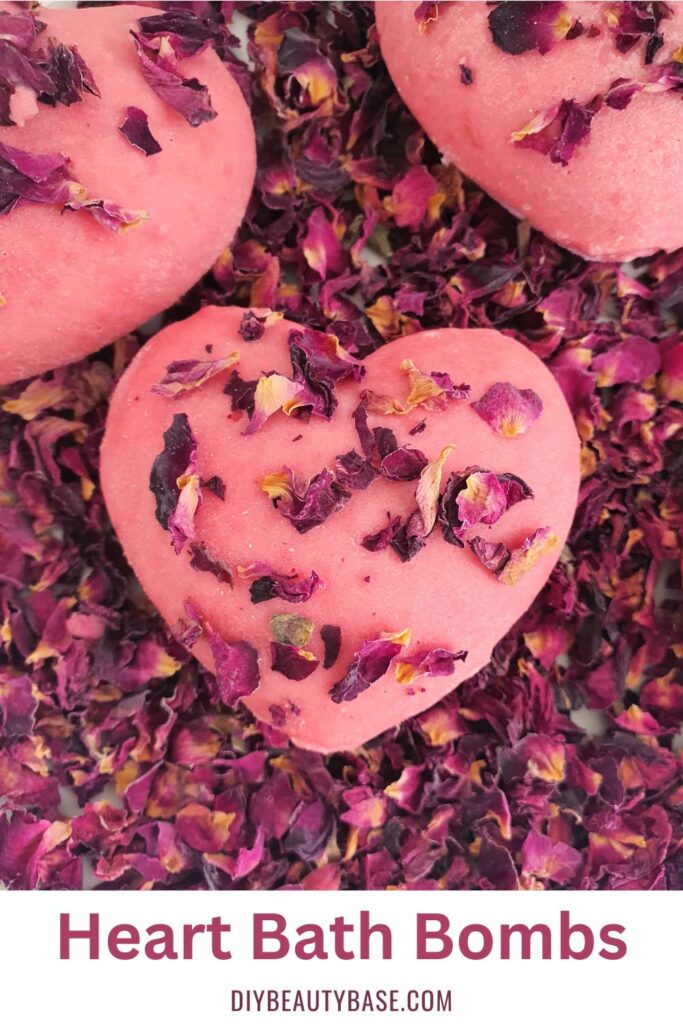
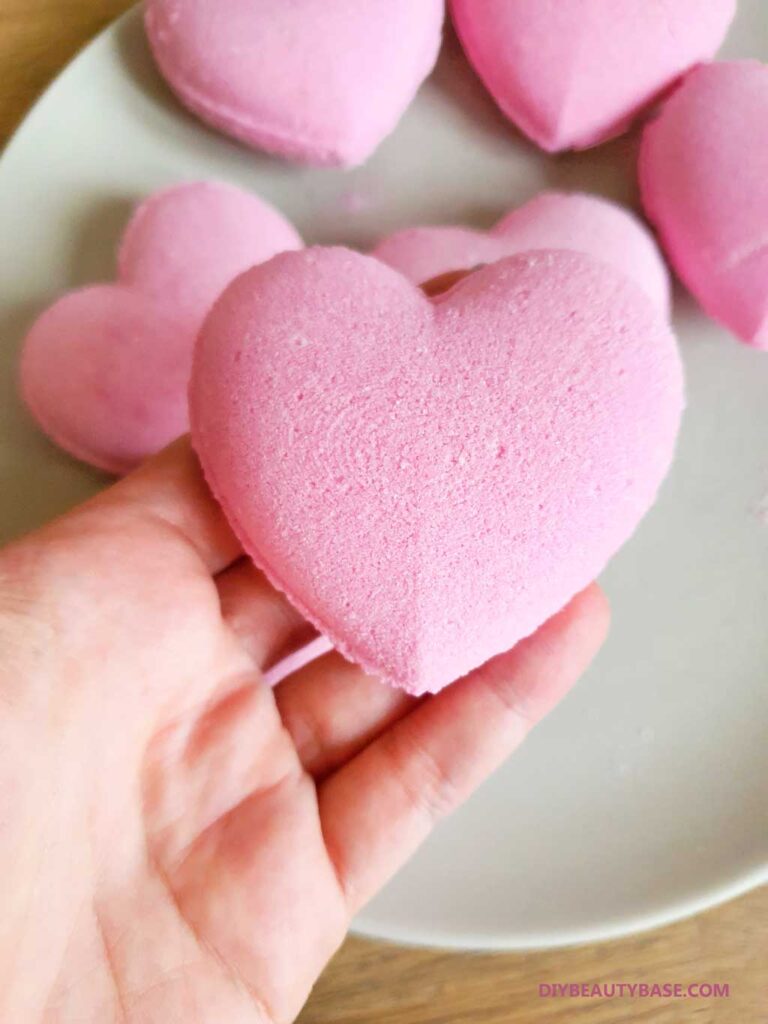
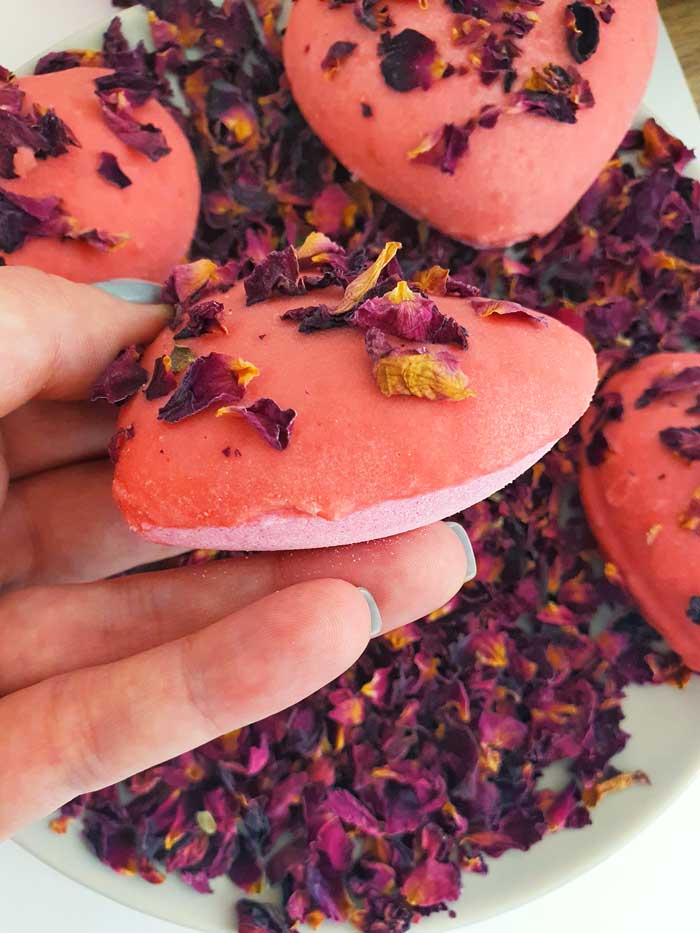
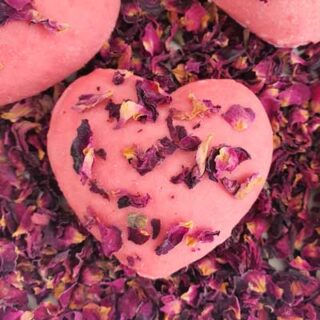
– Before each dip, stir the cocoa butter mixture with a spoon. Then, carefully immerse the bath bomb in the mixture for one second before removing it. Immediately sprinkle dried rose petals on the surface to help them adhere to the cocoa butter glaze.
Step 13: Dry finished heart bath bombs
– Let the bath bombs dry for overnight in a dry cool place. After that bath bombs are ready to be used or stored away for later in an airtight container.
HOW LONG DIY BATH BOMBS LAST AND HOW TO STORE THEM
Homemade bath bombs can last up to 6-12 months if stored properly. Just make sure to store them in an airtight container, away from any sources of heat and moisture (do not store in a bathroom!). With this simple step, your bath bombs will stay fresh and fizzy, ready to give you a luxurious soak whenever you want one!
MORE DIY IDEAS FOR VALENTINE’S DAY!
Interested in more DIY recipes suitable for Valentine’s day? Then check out these tutorials:
Lip Bath Bombs Inspired by Kylie Jenner
Himalayan Rose Bath Salts (With Labels)
Glazed Heart Bath Bomb Recipe
Get ready for a little self love with these DIY Heart Bath Bombs! Coated in creamy cocoa butter and topped with delicate rose petals, these bath bombs will leave you feeling pampered and refreshed.
Whether you're making them as a gift or just for yourself, this recipe is a surefire way to a perfect bath experience every time. Let's get started on some bath bomb magic!"
Ingredients
Heart Bath Bomb Recipe
- 2 cups of baking soda
- 1 cup of citric acid
- 6 tbsp. of cornstarch
- 6 tbsp. of buttermilk powder
- 1 tbsp. of liquid oil or melted cocoa butter
- 2 tbsp. of Polysorbate 80
- Pink mica powder
- approx. 15 drops of essential oils
Cocoa butter bath bomb glazing recipe
Other Supplies
- Heart shaped bath bomb mold
- Heat resistant bowl or stainless steel double boiler pot for melting chocolate
- A large bowl for mixing ingredients
- Gloves
Instructions
- Combine dry ingredients. In a large mixing bowl, combine the baking soda and citric acid. Sieve in the cornstarch and buttermilk powder to make sure that they are evenly distributed throughout the mixture. Both the cornstarch and buttermilk powder are fine powders that have a tendency to clump, so sieving is important to guarantee uniformity in the bath bomb mix.
- Add color. Add the pink mica powder and mix thoroughly. As a guide, I used about 3 dashes, but you can adjust the amount to achieve your desired shade. You can also opt for liquid soap color or food coloring to achieve a more vibrant hue. Liquid soap colorant or food coloring will tint the bath bomb foam in addition to the bath bomb itself. Using mica powder will result in a white foam. Please keep in mind that it can be challenging to achieve a dark and intense color with mica powder. For my recipe, I aimed for a light hue, but if you prefer a darker shade, consider using liquid colorant.
- Mix in liquid ingredients. In another mixing bowl, combine the oil(or melted cocoa butter), Polysorbate 80, and essential oils. Mix these ingredients thoroughly and then add to the main bowl.
- Mix the bath bomb mixture. Keep mixing the bath bomb mixture for at least 5 minutes to make sure that the liquid components are well incorporated. I prefer using my hands for mixing (don't forget to wear gloves).
- Test consistency. The final mixture should have a texture similar to slightly moist sand. To test its consistency, try squeezing it in your palm. If it holds its shape, then it's ready to be molded. If it crumbles, add moisture by spraying a mixture of half rubbing alcohol and half water from a spray bottle. Mix immediately after spraying. Instead of the water and alcohol mix, you may also use witch hazel or plain water. If you use plain water make sure you only spray a small amount at the time and mix immediately to avoid prematurely activating the citric acid.
- Packing the heart-shaped molds- Scoop a small amount of the mixture into the mold and press it down firmly with your fingers to make sure the edges are filled. Add more of the mixture, making sure each mold half is slightly overfilled. Repeat for both halves. Carefully bring the two halves together and firmly press them together. Hold the mold in place for 15 seconds, then remove the bath bomb from the mold.
- Dry the bath bombs. Let the bath bombs dry for overnight in a dry cool place.
- Make cocoa butter glaze. Slowly melt the cocoa butter in a double boiler over low heat. Once fully melted, incorporate the baking soda and stir until fully combined.
- Color cocoa butter glaze. Remove from heat and stir in the mica powder to desired intensity. I added approx. 4 dashes of mica powder, but you can adjust it according to personal preference.
- Let cocoa butter thicken. While cocoa butter is hot, you will notice that even though you mixed it with baking soda, the soda sinks to the bottom. This will change once the cocoa butter starts cooling down. Let it cool down for a couple of minutes and continue to mix it. You will notice the mixture thickening slightly like in the photo below. At this point, you can start dipping your bath bombs.
- Dip heart bath bombs in cocoa butter glaze. Before each dip, stir the cocoa butter mixture with a spoon. Then, carefully immerse the bath bomb in the mixture for one second before removing it. Immediately sprinkle dried rose petals on the surface to help them adhere to the cocoa butter glaze.
- Dry finished heart bath bombs. Let the bath bombs dry for overnight in a dry cool place. After that bath bombs are ready to be used or store away for later in an airtight container.